MOS Customer Service System Integration Documentation
1. Customer Service Account Setup Process
1.1 Access Customer Service Account Creation Entry
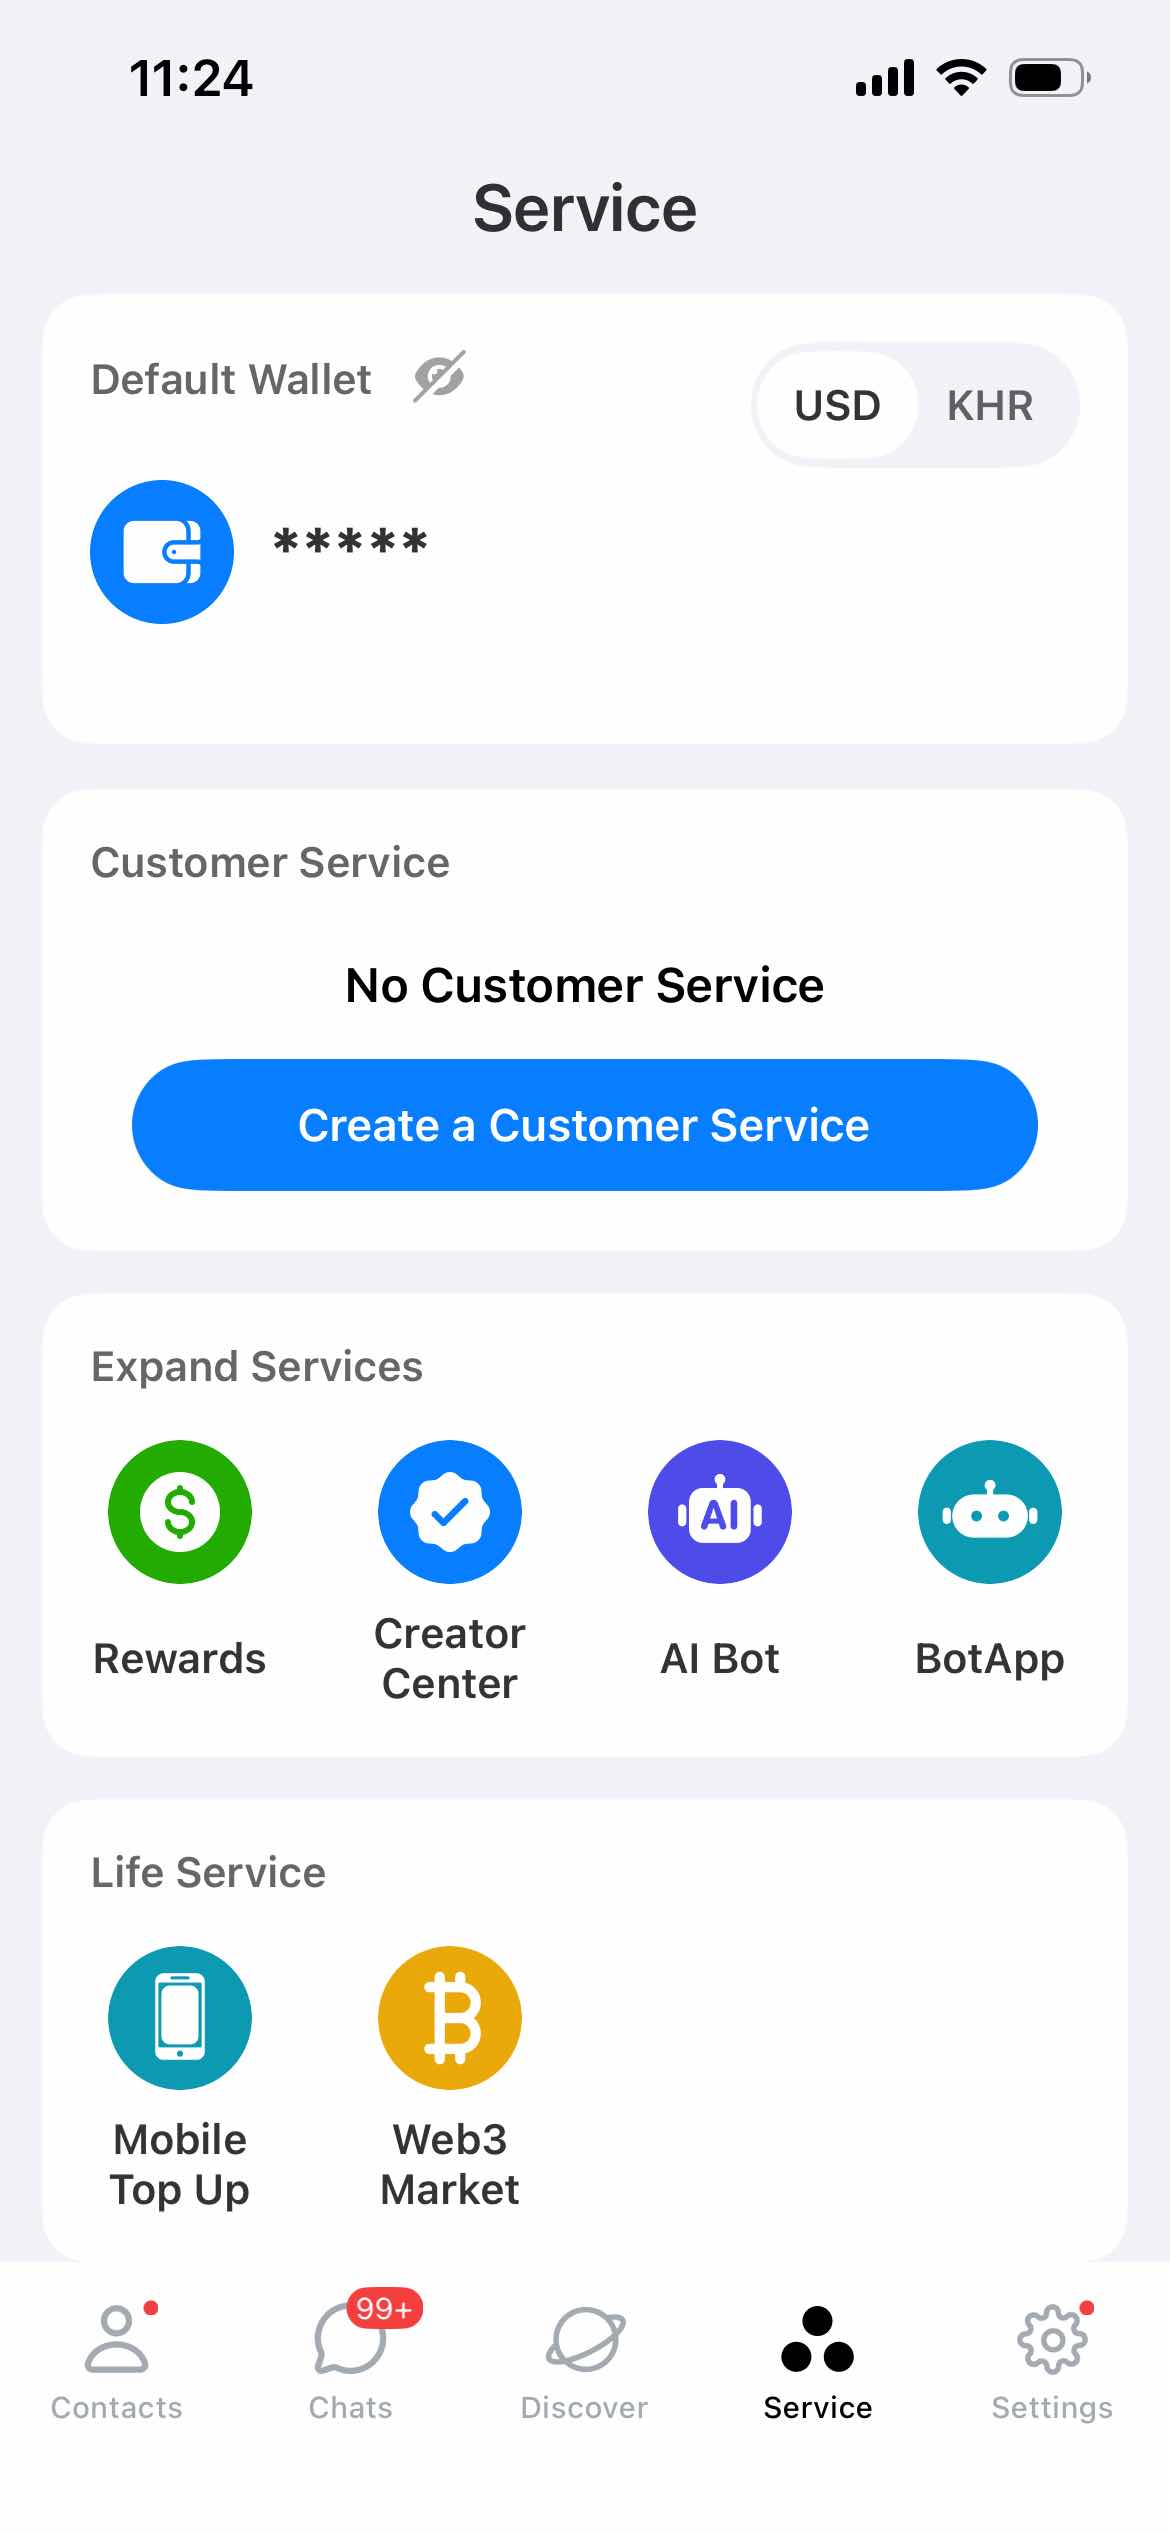
After logging into the MOS mobile application, navigate to the "Services" module through the navigation menu, click the "Create a Customer Service" function button to initiate the customer service account creation process.
1.2 Basic Information Configuration
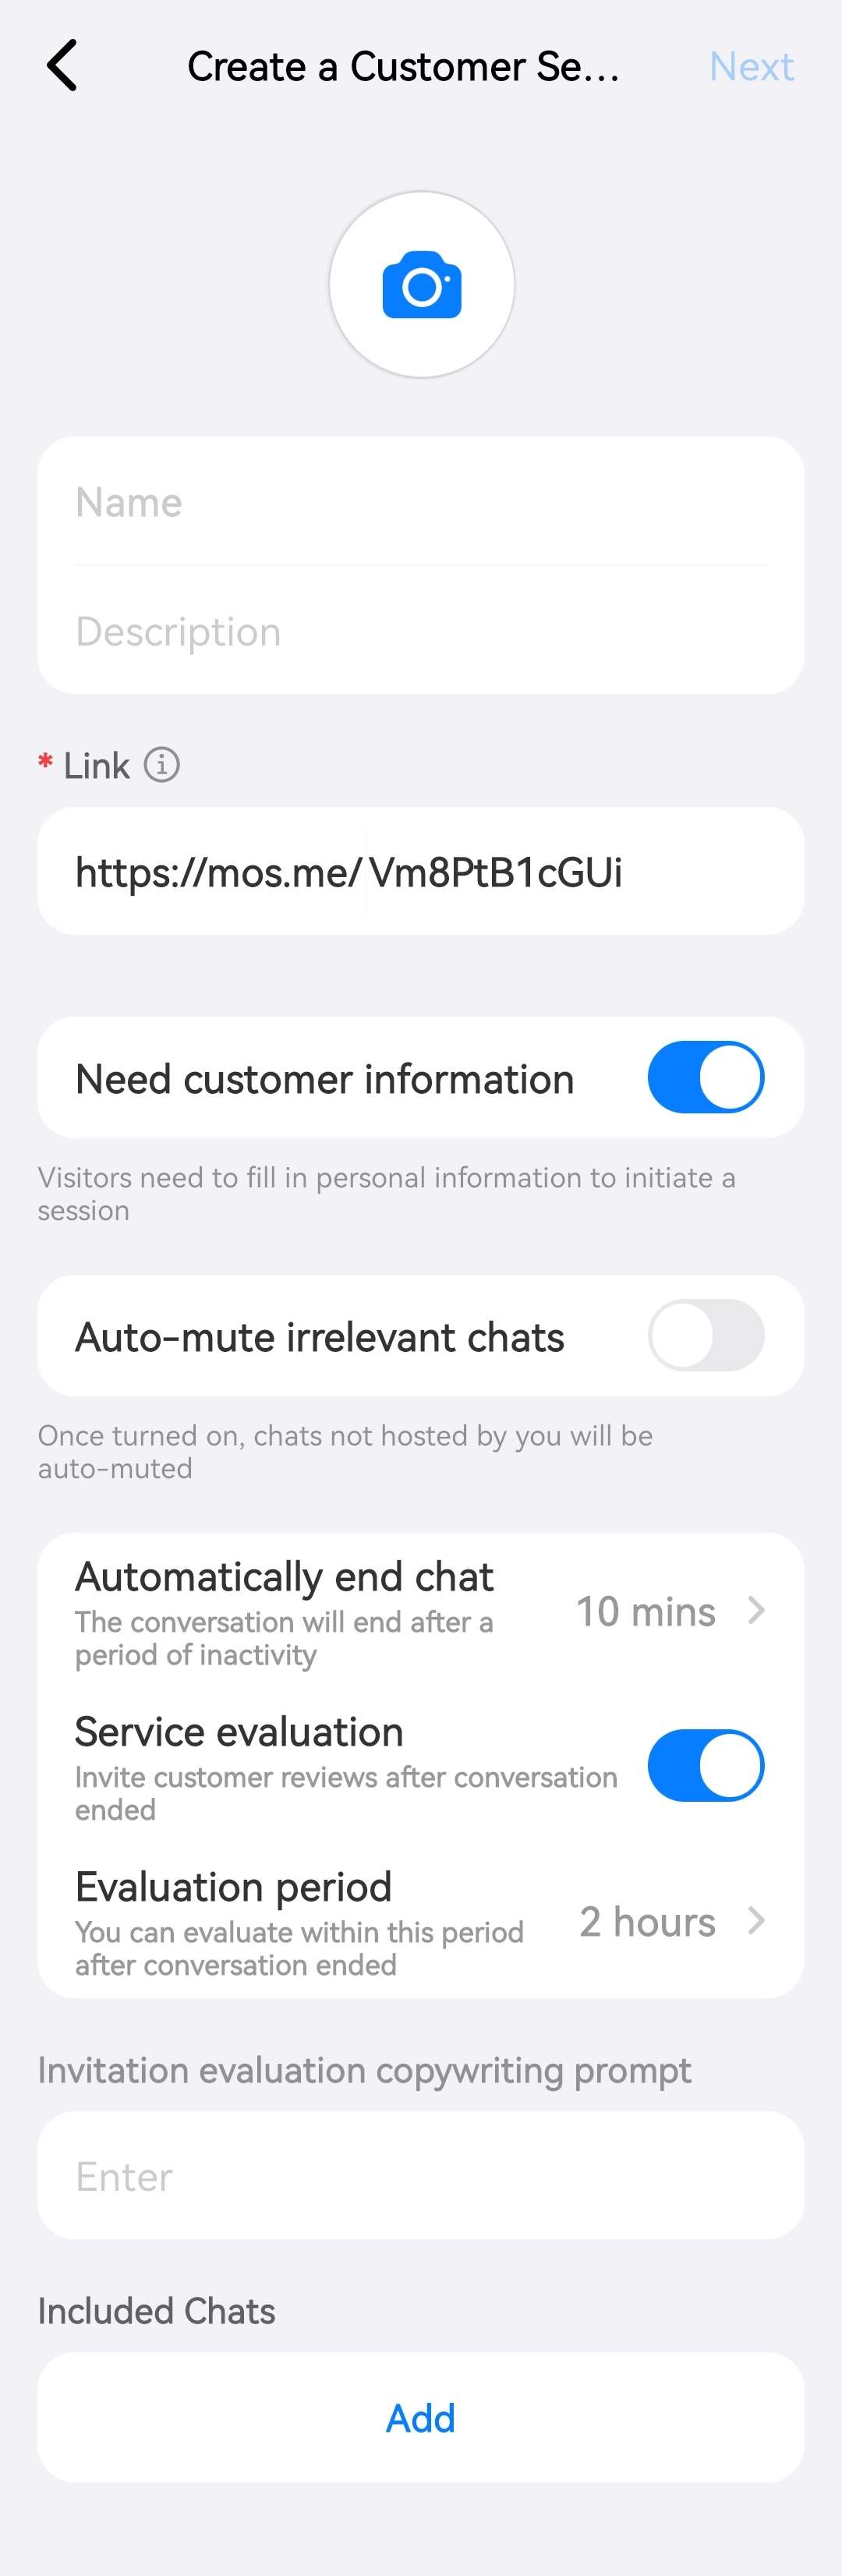
Upload the customer service account avatar, accurately fill in basic information such as the customer service account name and function description. After confirming the information is correct, click "Next" to proceed to the subsequent configuration steps.
TIP
The link displayed in the image above is the unique access address for the customer service account, with the standard format as follows:
https://mos.me/{YOUR_CUSTOMER_SERVICE_ID}
Where {YOUR_CUSTOMER_SERVICE_ID} is the unique identifier for the customer service account (i.e., Customer Service ID), which should be properly stored and accurately used for subsequent integration configurations.
Customer Service ID Retrieval Guide
Log in to the MOS mobile application
Navigate through: Service → Customer Service → Any menu item (such as "Data")
Switch to the "Settings" tab, click on the avatar and name area
The string following
https://mos.me/in the current page URL is the Customer Service ID (YOUR_CUSTOMER_SERVICE_ID)
1.3 Service Script Configuration and Activation
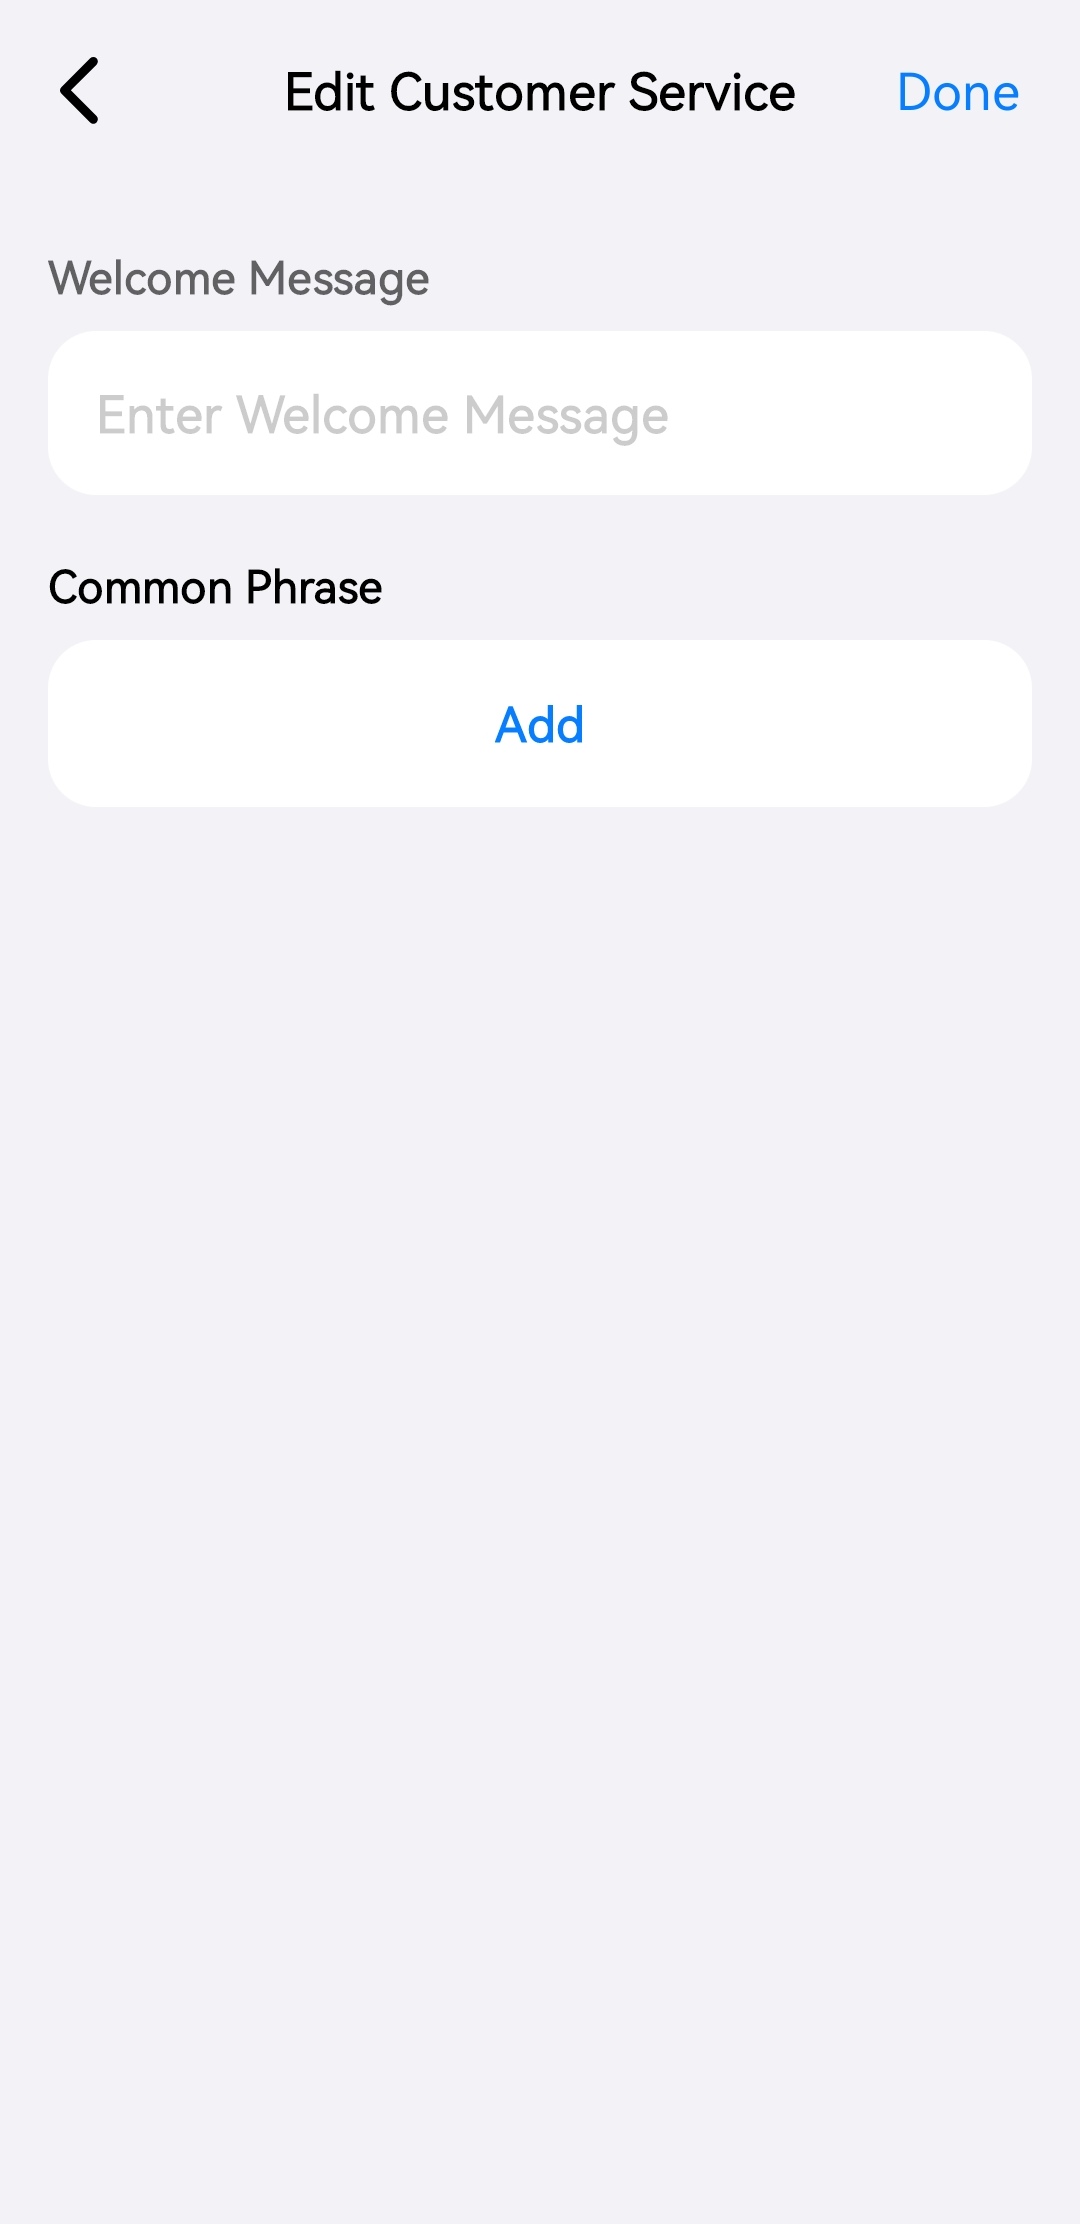
Configure customer service welcome messages and common phrases according to business requirements. After completing the configuration, click the "Done" button, and the customer service account will be automatically activated and ready for use.
2. Customer Service System Integration Solutions
2.1 Direct Access
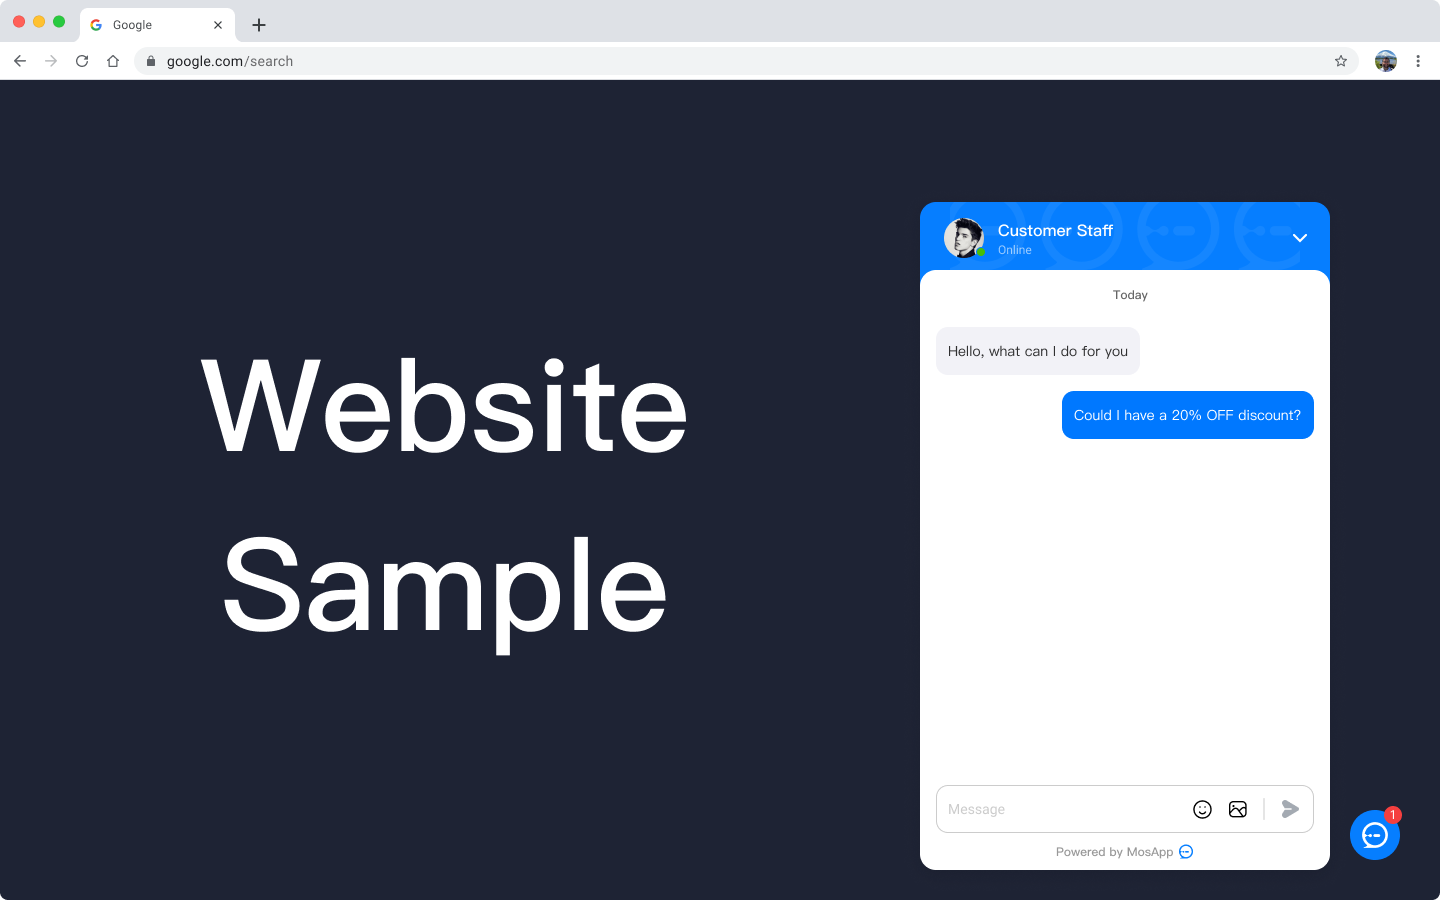
Users can enter the customer service account's unique access address (https://mos.me/{YOUR_CUSTOMER_SERVICE_ID}) in any mainstream browser to directly enter the online chat interface and establish real-time communication with customer service personnel. This method requires no development integration and is suitable for rapid deployment scenarios.
2.2 Web Page Embedding
2.2.1 Solution Overview
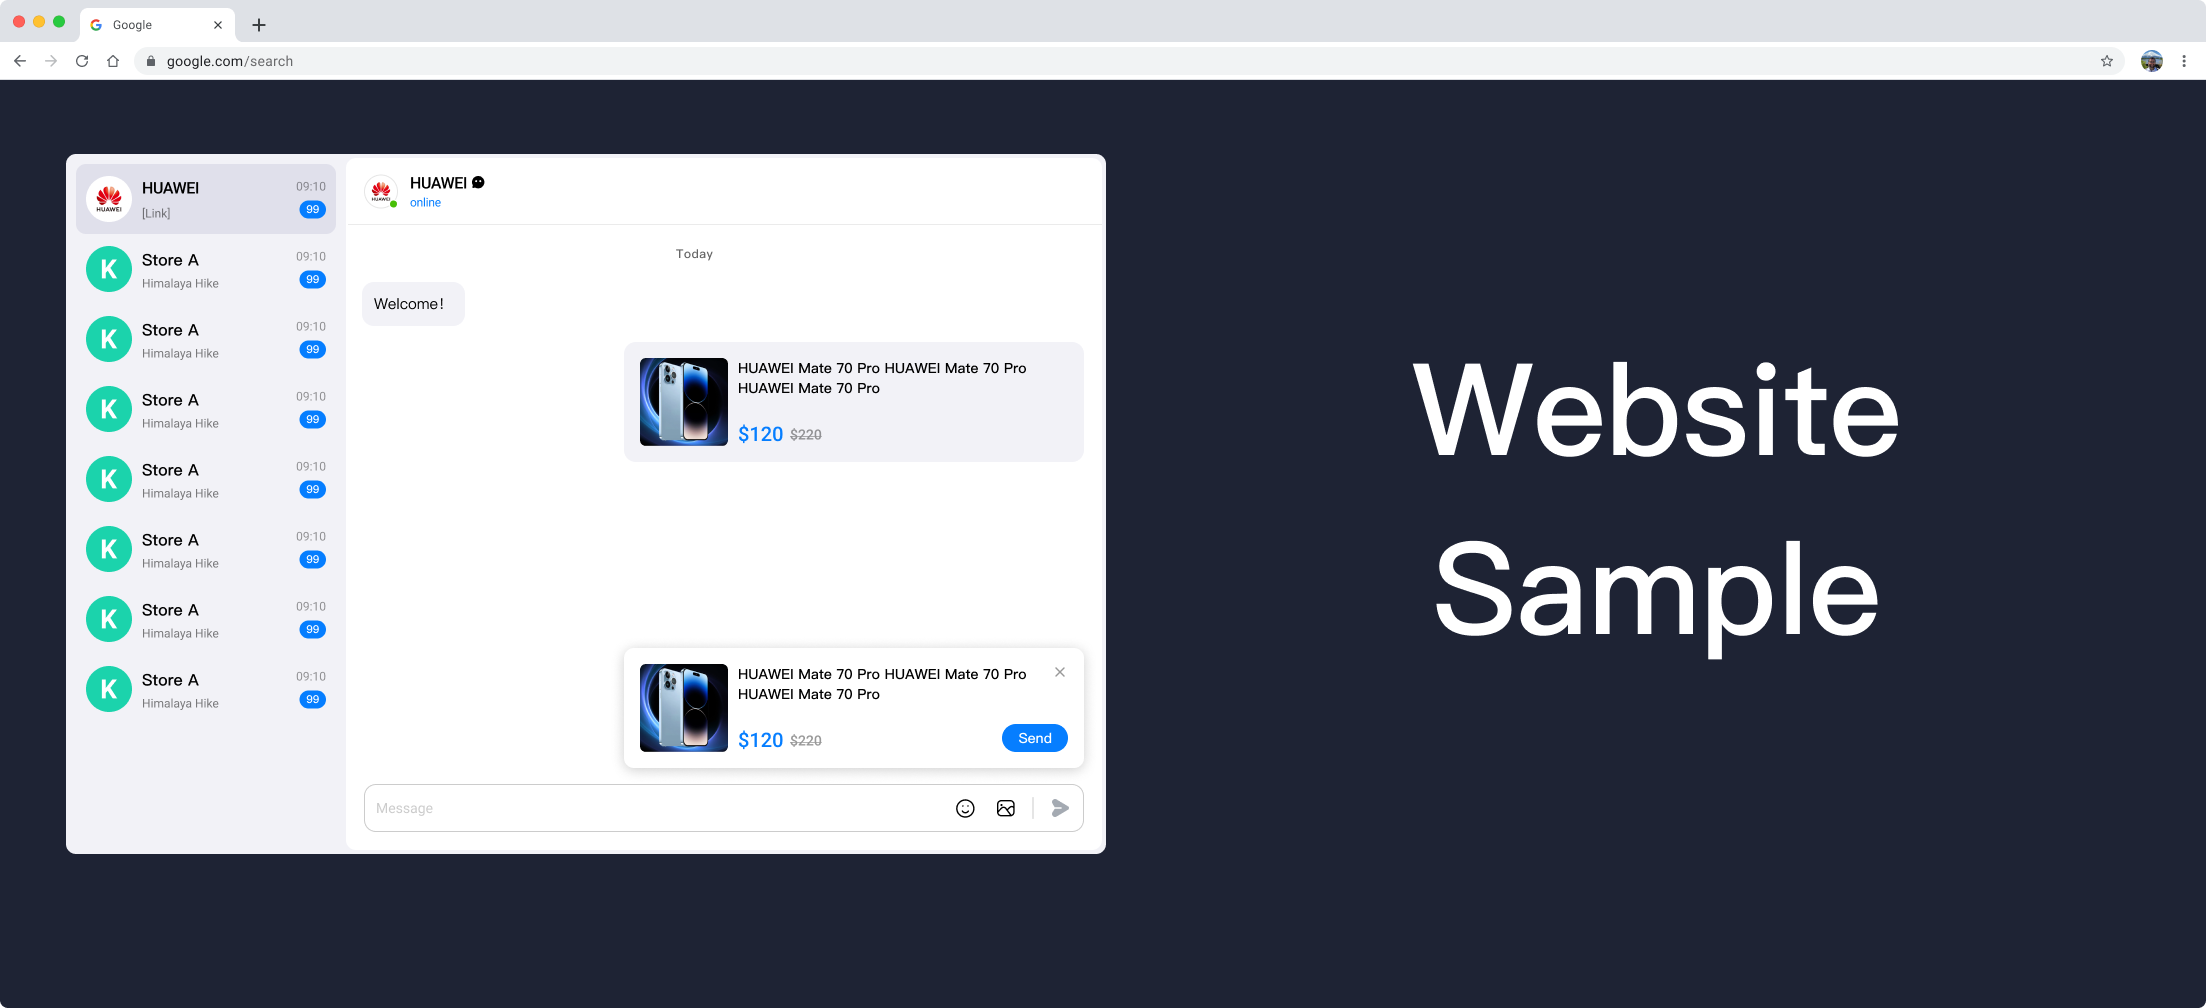
MOS customer service system provides a standardized JavaScript SDK embedded solution that supports seamless integration of customer service functionality into enterprise official websites, member centers, and other web scenarios. The solution uses asynchronous loading mechanism to avoid impacting the rendering performance of the host page and ensure user access experience.
Preview Effect:
2.2.2 Integration Implementation Steps
Insert the following standardized integration code snippet before the closing
</body>tag of the target webpageAfter code execution, the latest version of the customer service system SDK will be automatically loaded, and the customer service entry component will be initialized in the bottom-right corner of the page
<script type="text/javascript">
  (function(m, ei, q, i, a, j, s) {
      m[i] = m[i] || function() {
          (m[i].a = m[i].a || []).push(arguments)
      };
      j = ei.createElement(q),
          s = ei.getElementsByTagName(q)[0];
      j.async = true; // Enable asynchronous loading to avoid blocking page rendering
      j.charset = 'UTF-8'; // Specify character encoding for compatibility
      j.src = 'https://cdn-oss.mos.me/public/js/mossdk.js'; // Official SDK resource address
      s.parentNode.insertBefore(j, s);
  })(window, document, 'script', '_MOSCONFIG');
  // Initialization configuration: replace with actual customer service ID
  _MOSCONFIG('YOUR_CUSTOMER_SERVICE_ID');
</script>
2.2.3 Technical Specifications and Considerations
Code Deployment Location: Must be deployed before the closing
</body>tag to ensure SDK initialization after DOM nodes are loadedLoading Mechanism: Uses non-blocking asynchronous loading, SDK loading process does not affect the parsing and rendering of the host page
Authentication: The
YOUR_CUSTOMER_SERVICE_IDin the code must be replaced with the actual customer service ID, otherwise normal service access will failSDK Acquisition Path: The latest version of the official SDK can be obtained through the MOS mobile application via: Service → Customer Service → Any menu item (such as "Data") → Settings → System Integration → Embed Web Page
2.3 Customer Service System SDK
2.3.1 Solution Overview
MOS provides a full-featured JavaScript SDK that supports enterprises to customize integration according to business scenarios. Core capabilities include:
Support for embedding customer service windows in any DOM node on web pages
Support for real-time transmission of structured business data (such as orders, product information)
Support for accurate transmission of customer source identification and conversation context information
Support for responsive layout, automatically adapting to desktop and mobile scenarios
Preview Effect:
2.3.2 SDK Acquisition and Reference
2.3.2.1 SDK Acquisition
Download the latest stable version through the official CDN: mos-customer-service-sdk.umd.js
2.3.2.2 Reference Method
Introduce the SDK through standard <script> tag, which will automatically register the MosCustomerService namespace in the global scope:
<!-- MOS Customer Service System SDK Introduction -->
<script src="mos-customer-service-sdk.umd.js"></script>
2.3.3 SDK Initialization and Configuration
2.3.3.1 Container Preparation
Predefine the DOM container for hosting the customer service window in the webpage, and explicitly set the container width and height styles to ensure normal rendering:
<body>
  <!-- Customer service system container: width and height can be adjusted according to business scenarios -->
  <div id="mos-cs-container" style="width: 1000px; height: 400px;"></div>
</body>
Responsive Layout Description
Mobile Adaptation: When container width ≤ 900px, SDK automatically enables mobile-adapted UI styles
Desktop Adaptation: When container width > 900px, SDK automatically enables standard desktop UI styles
2.3.3.2 Instance Initialization
Initialize the customer service instance through the MosCustomerService.init() method, passing the container node and configuration parameters:
// Initialize customer service system instance
const csInstance = MosCustomerService.init(
  document.getElementById('mos-cs-container'), // Container DOM node
  {
    apiKey: 'YOUR_CUSTOMER_SERVICE_ID' // Customer Service ID (required, replace with actual value)
  }
);
2.3.3.3 Product Information Popup Configuration
Through the product configuration item, you can display business information popups such as products/orders in the customer service window, supporting structured data transmission:
// Product information data structure definition
interface ProductInfo {
  title: string;       // Product title (required)
  desc?: string;       // Product detailed description (optional)
  price?: string;      // Product current price (optional, priority higher than desc)
  linePrice?: string;  // Product original/strikethrough price (optional)
  cover?: string;      // Cover image URL (optional)
  linkUrl?: string;    // Detail page redirect URL (optional)
}

// Initialization example with product information
const csInstance = MosCustomerService.init(
  document.getElementById('mos-cs-container'),
  {
    apiKey: 'YOUR_CUSTOMER_SERVICE_ID',
    product: {
      title: 'Product Name',
      desc: 'Product detailed description information',
      price: '$100.00',
      linePrice: '$199.00',
      cover: 'https://example.com/cover.jpg',
      linkUrl: 'https://example.com/detail'
    }
  }
);
2.3.3.4 Message Sending Interface
Through the instance's sendMessage() method, you can actively send structured messages, supporting Promise chain calls:
/**
 * Send order information example
 * @returns {Promise<void>} Send result Promise
 */
async function sendOrderMessage() {
    const orderData = {
      title: 'Order Number: ORD20240001',
      desc: 'Order creation time: 2024-01-01 10:00:00',
      price: '$100.00',
      linePrice: '$200.00',
      cover: 'https://example.com/order-cover.jpg',
      linkUrl: 'https://example.com/order-detail?ord=20240001',
    };
    try {
      await csInstance.sendMessage(orderData);
      console.log('Order information sent successfully');
    } catch (error) {
      console.error('Order information sending failed:', error);
    }
}
2.3.3.5 Complete Configuration Parameter Description
| Configuration Item | Required | Default Value | Data Type | Description |
|---|---|---|---|---|
| apiKey | Yes | - | String | Customer service account unique identifier (Customer Service ID), used for authentication and service association |
| timeout | No | 30000 | Number | Message sending timeout time, unit: milliseconds (ms) |
| source | No | - | String | Customer source identification, used for data analysis and channel tracking |
| product | No | - | Object | Product information configuration object, structure refers to ProductInfo interface |
2.3.3.6 Complete Integration Example Code
<!DOCTYPE html>
<html lang="en">
<head>
  <meta charset="UTF-8">
  <meta name="viewport" content="width=device-width, initial-scale=1.0">
  <title>MOS Customer Service System SDK Integration Example</title>
</head>
<body>
  <h1>MOS Customer Service System Demo</h1>
  <!-- Customer service system container -->
  <div id="mos-cs-container" style="width: 1000px; height: 400px; border: 1px solid #eee;"></div>

  <!-- Send message button -->
  <button onclick="sendOrderMessage()" style="margin-top: 20px;">Send Order Information</button>

  <!-- SDK reference -->
  <script src="mos-customer-service-sdk.umd.js"></script>

  <!-- Initialization script -->
  <script type="text/javascript">
    // Initialize customer service instance
    const csInstance = MosCustomerService.init(
      document.getElementById('mos-cs-container'),
      {
        apiKey: 'YOUR_CUSTOMER_SERVICE_ID', // Replace with actual customer service ID
        timeout: 30000,
        source: 'Official Website Homepage', // Identify customer source as official website homepage
        product: {
          title: 'Flagship Product Package',
          price: '$299.00',
          linePrice: '$399.00',
          cover: 'https://example.com/product-cover.jpg',
          linkUrl: 'https://example.com/product/flagship'
        }
      }
    );

    // Send order information function
    async function sendOrderMessage() {
      const orderData = {
        title: 'Order Number: ORD20240001',
        desc: 'Order creation time: 2024-01-01 10:00:00',
        price: '$100.00',
        linePrice: '$200.00',
        cover: 'https://example.com/order-cover.jpg',
        linkUrl: 'https://example.com/order-detail?ord=20240001',
      };
      try {
        await csInstance.sendMessage(orderData);
        alert('Order information sent successfully');
      } catch (error) {
        alert('Order information sending failed: ' + error.message);
      }
    }
  </script>
</body>
</html>
3. System Parameter Extension Capabilities
3.1 Customer Source Identification
3.1.1 Function Description
Through the source parameter, you can precisely identify customer source channels (such as official website, APP, social media, etc.). This parameter can be used for:
Multi-channel traffic data analysis and conversion funnel statistics
Channel label annotation in customer profile building
Channel effectiveness evaluation for marketing campaigns
3.1.2 Technical Implementation
Append the source parameter after the customer service account access URL, with the parameter value being a custom channel identifier:
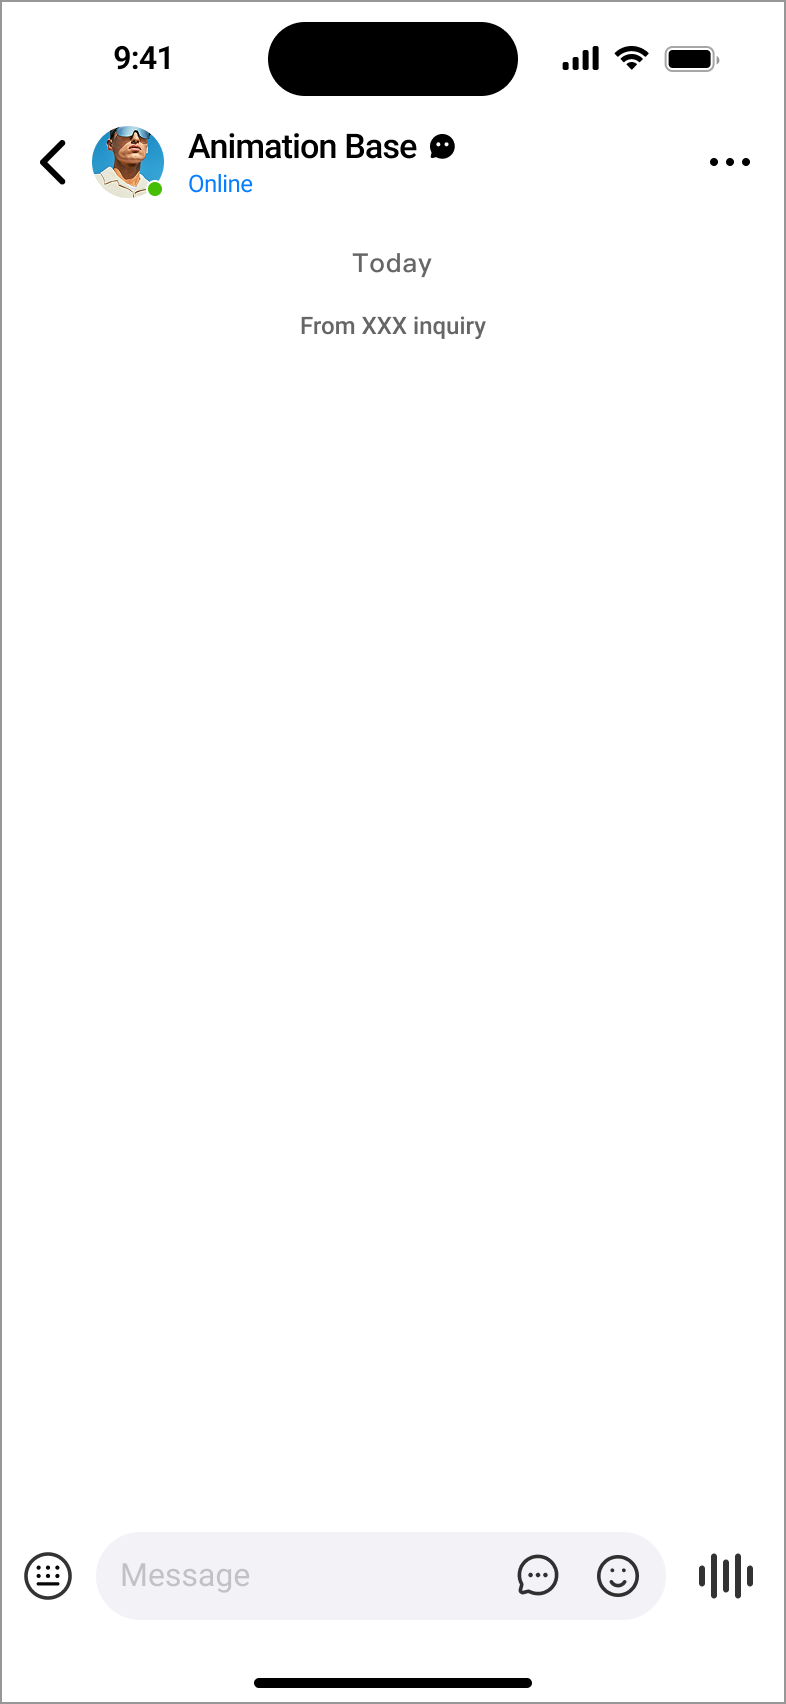
https://mos.me/{YOUR_CUSTOMER_SERVICE_ID}?source=XXXPreview Effect:
3.2 Context Function
3.2.1 Function Description
Pass structured business data (such as product information, order details, etc.) through URL parameters. The customer service end can directly obtain this context information during conversation initialization, eliminating the need for users to repeat descriptions, improving communication efficiency. The core enabling parameter is isMsgCard=1 (required).
3.2.2 Parameter Specification Definition
| Parameter Name | Required | Data Type | Parameter Description | Example Value |
|---|---|---|---|---|
| isMsgCard | Yes | Number | Context function enable identifier, fixed value is 1 | 1 |
| title | Yes | String | Message main title, used for quick identification of context topic | Flagship Product Consultation |
| desc | No | String | Detailed description information, supplementing topic content | Does this product support customization? |
| cover | No | URL | Cover image resource address, recommended to use HTTPS protocol | https://example.com/cover.jpg |
| linkUrl | No | URL | Detail page redirect address, click to open corresponding page | https://example.com/product/123 |
| price | No | String | Product current price, priority higher than desc field | $299.00 |
| linePrice | No | String | Product original/strikethrough price, used for price comparison display | $399.00 |
Technical Specification Requirements
Encoding Specification: All parameter values must be encoded through
encodeURIComponent()to avoid parameter parsing exceptions due to special charactersSecurity Protocol: Resources such as images and redirect links must use HTTPS protocol to ensure data transmission security
Length Limit: Total URL length should be controlled within 2000 characters to avoid exceeding mainstream browser URL length limits
3.2.3 Implementation Example Code
/**
 * Generate customer service link with context parameters
 * @param {Object} contextData - Context data object
 * @param {string} serviceId - Customer Service ID
 * @returns {string} Encoded customer service access link
 */
function generateContextServiceUrl(contextData, serviceId) {
  // Force set context enable identifier
  const params = { ...contextData, isMsgCard: 1 };

  // Encode parameters and concatenate
  const queryString = Object.entries(params)
    .map(([key, value]) => `${key}=${encodeURIComponent(value)}`)
    .join('&');

  // Concatenate complete URL
  return `https://mos.me/${serviceId}?${queryString}`;
}

// Usage example
const contextData = {
  title: 'Flagship Product Name',
  desc: 'Product detailed description information',
  cover: 'https://example.com/product.jpg',
  linkUrl: 'https://example.com/product/123',
  price: '$120',
  linePrice: '$220'
};
const serviceUrl = generateContextServiceUrl(contextData, 'YOUR_CUSTOMER_SERVICE_ID');
console.log('Customer service link with context:', serviceUrl);
3.2.4 Final URL Example
https://mos.me/{YOUR_CUSTOMER_SERVICE_ID}?isMsgCard=1&title=%E6%97%97%E8%88%B0%E4%BA%A7%E5%93%81%E5%90%8D%E7%A7%B0&desc=%E4%BA%A7%E5%93%81%E8%AF%A6%E7%BB%86%E6%8F%8F%E8%BF%99%E4%BF%A1%E6%81%AF&cover=https%3A%2F%2Fexample.com%2Fproduct.jpg&linkUrl=https%3A%2F%2Fexample.com%2Fproduct%2F123&price=%24120&linePrice=%24220Effect Display: 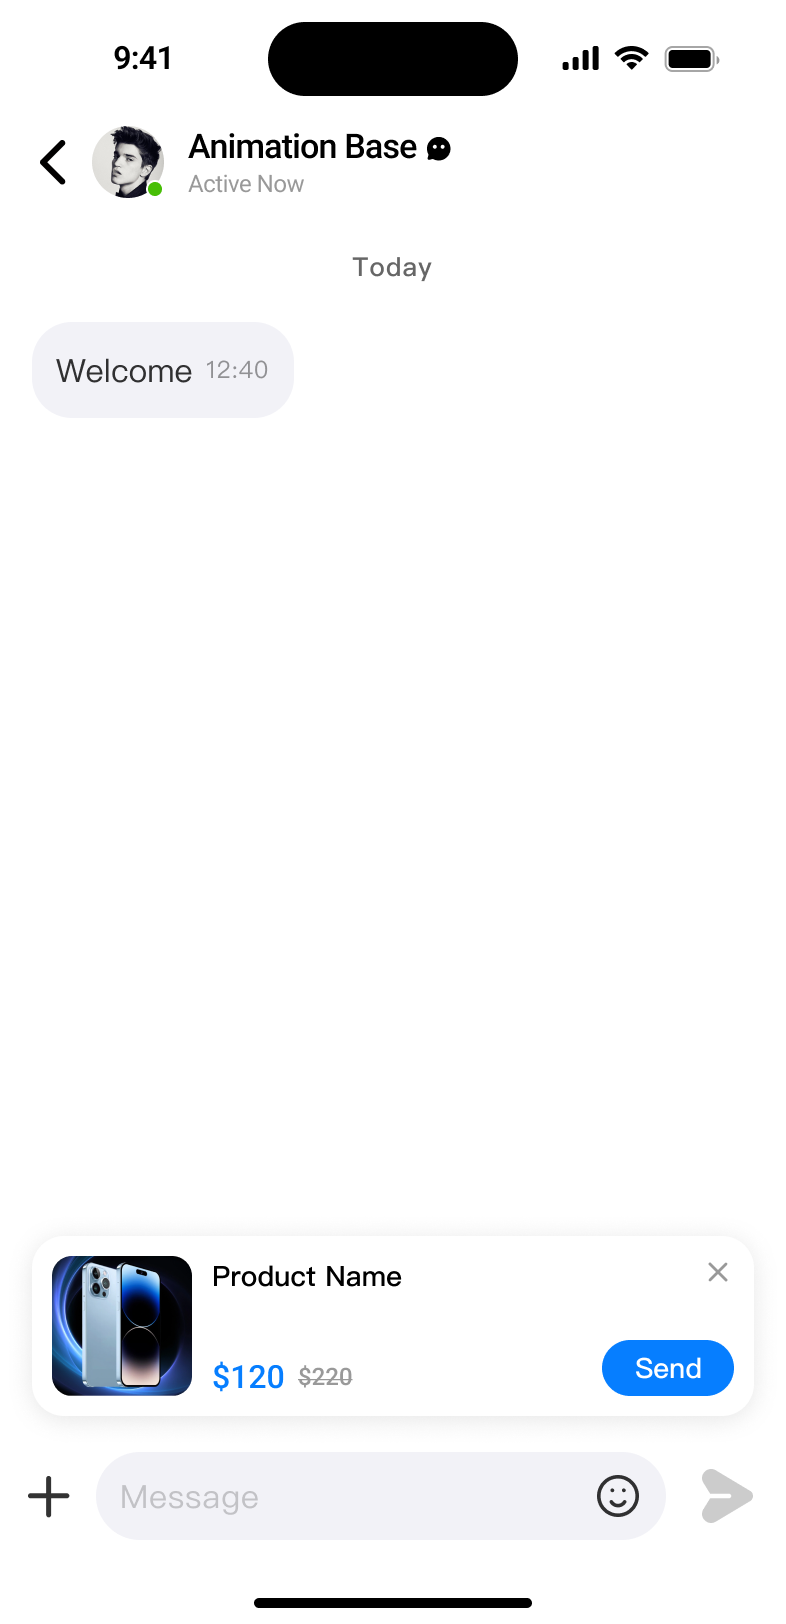
4. Telegram Integration Solution
4.1 Integration Overview
By integrating Telegram bots, consultation messages from Telegram platform users can be synchronized to the MOS customer service system. Customer service personnel can complete message replies directly within the MOS application without switching to the Telegram backend, improving multi-channel customer service response efficiency.
4.2 Configuration Steps
4.2.1 Telegram Bot Creation and Configuration
Search and add the @BotFather bot in the Telegram client
Send the
/newbotcommand and follow the instructions to complete bot name and username settingsAfter successful creation, BotFather will return the bot token, format as follows, which should be properly saved:
110201543:AAHdqTcvCH1vGWJxfSeofSAs0K5PALDsawDetailed creation instructions can refer to Telegram official documentation: BotFather Usage Guide
4.2.2 MOS System Integration Configuration
Log in to the MOS mobile application, navigate through: Service → Customer Service → Any menu item (such as "Data") → Settings
Find the "Telegram Integration" function module in the settings page
Paste the bot token obtained in step 4.2.1 into the "Telegram Bot Token" input box
Click the "Save" button to complete the integration configuration
Integration Verification
After configuration is complete, you can send test messages to the created bot using the Telegram client. If the MOS customer service system can receive them normally, it indicates successful integration.